BUILDING WITH ICF BLOCKS
Why do builders use insulated concrete form (ICF) construction over traditional construction?
Happy home owners is the main reason – they love the efficiency and performance of an ICF building envelope. Typically more insulated and more comfortable than their conventionally formed or stick-built counterparts, they don’t leave home owners worrying about the winter chill, summer heat or ever rising energy costs.
And for the builders, Nexcem ICF Blocks are easy to install and are less affected by cold or wet site conditions. The installation process is straightforward and you’ll find that the overall construction costs of this high-quality concrete construction method are closer than you would think to that of traditional construction.
In this post, we will walk you through the steps to successfully install Nexcem ICF walls.
7 STEPS FOR BUILDING BELOW-GRADE AND ABOVE-GRADE WALLS WITH ICFS
1. Form, place, and finish strip footings
Footings, slabs, and piles serve as the base for the ICF wall assembly, so there’s little room for error when it comes to their levelness. It is actually preferred to have the top of your footing purposely sloping to the exterior and away from the wall. That way if any water does accumulate on the top of the footing it will certainly drain away from the wall and to your weeping tile. If you are set on making it level, then your target tolerance here is about +/- 1/4-inch. Apart from this, the footings may be of any code-compliant size or configuration.
It is always good practice to have 2 – 15M (#5) bar running longitudinally in the footing so that the footing can span over weak and soft spots in the soil. You also need to place dowels in your footings or slab – typically 10m or 15m (#4 or #5) rebar dowels, generally wet-set at 24 – 36″ inches O.C. You want to plan these dowels to be in the concrete core of the Nexcem blocks that haven’t been laid yet, so it will require some planning and layout. You can find the dowel layout configurations here.
2. Install the ICF forms
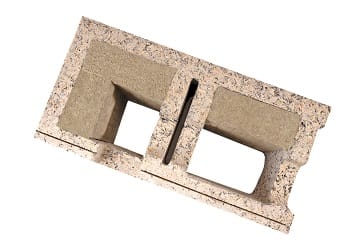
With footings in place, it’s time to install the ICFs. Start with a corner; corner blocks are usually modified End blocks as shown here and look like this:
Alternate the long side of the corner with each course you lay to create a running bond pattern; it should look like this:
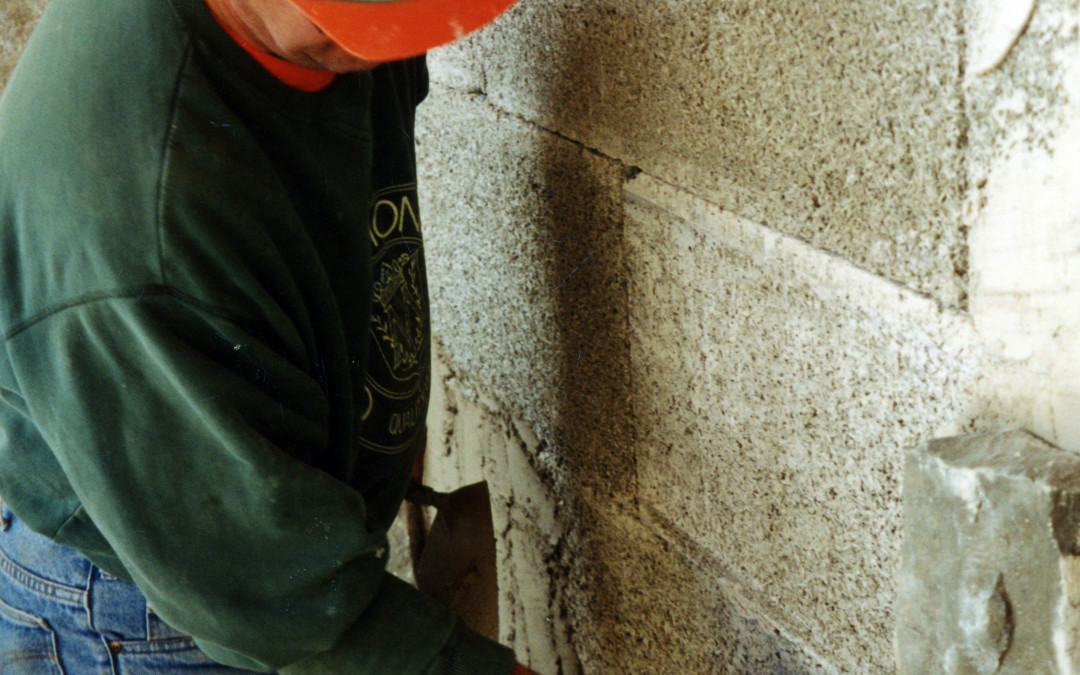
Now lay the straight blocks. If you must cut the Nexcem ICF form, with a carbide blade skill saw or reciprocating saw. Mark all cut locations so that you know where to apply additional bracing. Additional bracing is required at all cut locations.

Bracing ICF blocks at cut locations
After completing the second course, check if the blocks you placed are level; if they aren’t, you may need to shim or trim the bottom of the first course to level out the assembly. The subsequent rows should be level as you go up and follow the same running bond pattern you established in the first two courses.
Continue to install rebar as you progress with the ICF forms. Here are some things to keep in mind:
- Horizontal bars need a 2-inch cover from the concrete face along the vertical plane. Alternate horizontal bars between the interior side and exterior side. This will allow for placement of vertical bars between the horizontals. use a small finishing nail into the web to hold the horizontal rebar in position.
- Vertical bars need a 1 1/2-inch cover from the top of the concrete. Vertical bars are installed once a full story is erected, prior to pouring concrete. Slide the vertical bars down in between the alternating horizontal rebar so that it is in the center of the wall and can’t shift (because of the horizontal bars).
4. Create openings
As you continue to erect the forms, you’ll have to create openings for windows and doors;
Nexcem blocks don’t settle like polystyrene ICF so no gaps are required.

5. Pouring and vibrating concrete
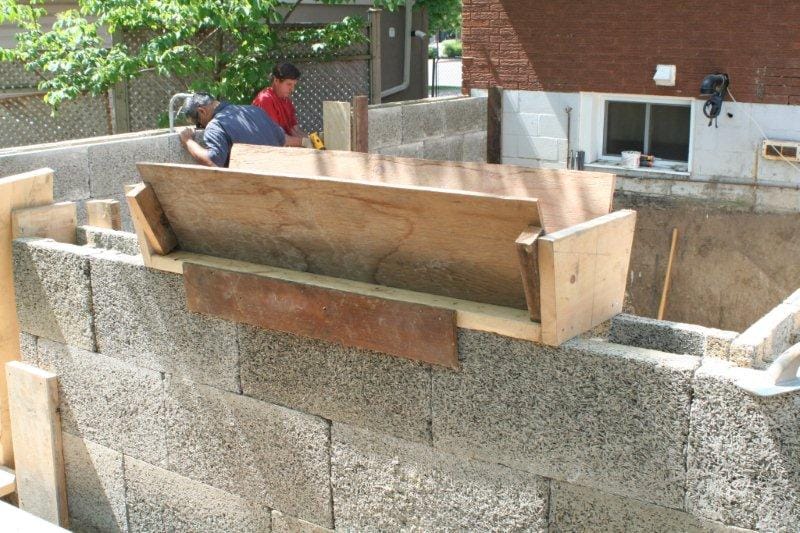
Before you pour, brace, and align the ICF forms you’ve erected with an adequate mechanism, such as the Giraffe or Plumwall ICF bracing systems. If you have the time you can build a trough to direct the concrete into the forms.
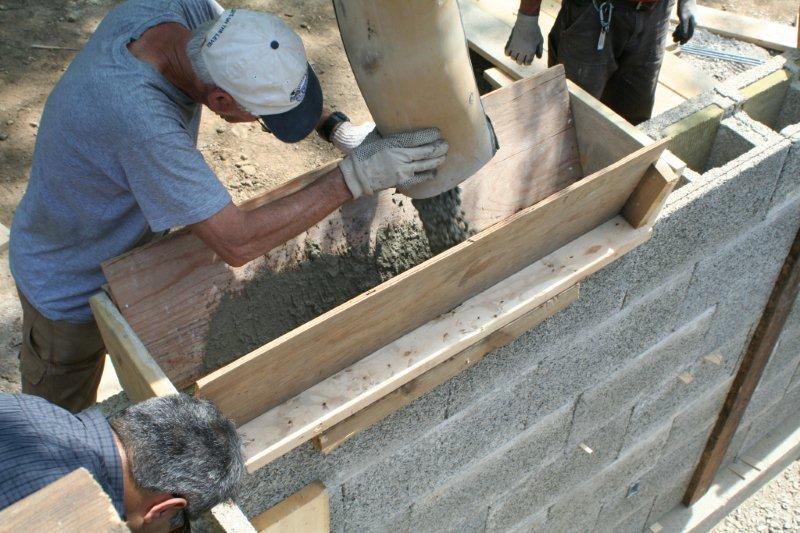
Now you’re ready to fill the forms with concrete. For optimal concrete flow, use a 2 1/2-inch or a 4-inch reducer. Minimum 8″ slump is recommended. Pour continuously in 4′ lifts as you move around the perimeter of the building.
You only need to vibrate at locations of steel “congestion” which is typically around openings and wherever the structural design requires more steel than normal. When you’ve poured the entire height of the walls, level off the concrete and embed anchor bolts for future connections to the floor and/or roof framing.
When it’s cold, cover the top of your pours with an insulated tarp. The concrete will achieve its design strength without defects best when shielded from sub-zero temperatures.

6. Waterproof the forms
Below-grade ICF forms require waterproofing. A peel-and-stick product is often used to protect the foundation walls from water and moisture ingress. Be sure to use the primer/adhesive before applyhing the waterproofing. You can use solvent-based products as you would on a conventional foundation wall; Nexcem will not corrode like polystyrene.
With a 2-3 person crew, treat the footings first. Then, start at an ICF corner and continue. Be sure to follow all instructions from the membrane manufacturer that may pertain to an ICF application.
7. Parging
Apply a thin layer of exterior grade sheathing over the Nexcem for the exposed parts of the foundation. You can even use a thin layer of corkboard insulation. Overlap the the top 2 inches of the waterproofing membrane and then parge over the exterior sheathing.
A FEW TIPS FOR BUILDING WITH INSULATED CONCRETE FORMS
- To bridge the cold joint where one story of wall ends, and the next begins use embedded rebar dowels generally 24 inches o/c.
- An ideal foundation wall height when building with 12-inch tall Nexcem ICF blocks is 9 or 10ft. If going 10ft, To make drywall installation easier, measure the final height of wall after installation and flooring. Use this case, use an OSB rim around the bottom of the walls, and place 9-foot drywall sheets on top, then nail the baseboard directly to the OSB rim.
WRAPPING IT UP
If you’re choosing Nexcem ICF for your project, we have one last tip: connect with us before you build. A specialist will walk you through the installation in-depth, offer design suggestions, quotes, and see to it that you’re ready to succeed with Logix ICF.
Please share your projects with us by using #NexcemICF.
Please contact Nexcem professionals for more information on building a net-zero energy home.